How to Connect, Analyze and Report on your Data!
211s can connect, analyze and report on their resources data using industry-leading solutions such as Tableau, Power BI and Excel. The National Data Platform's (NDP) architecture and security features enable 211s and authorized third-parties to easily connect to resource and contact data, providing best-in-class analytical and reporting services. 211s can share rich insights to inform local, regional, state and natioal policy development, and help direct investment towards community service gaps and maximize public benefit.
This page helps 211s to connect their data, secured within the NDP, using Tableau, Power BI and Excel. Other analytical/reporting solutions may also connect to NDP data, using patterns similar to those of PowerBI, Tableau and Excel, if supported.
Note 1: Information on this page is intended to help 211s to connect to their data using Tableau, PowerBI and Excel. For information on how to use each of these solutions to analyze, visualize and/or report on data, please consult the product's documentation.
Note 2: The below instructions assume that your organization is contributing data to the NDP. All contributing 211s have access to their resources data. 211s using resource management products that support export of contact data (e.g. iCarol) will also have access to their contact data in the NDP. If you are having difficulty connecting to your data using the below instructions, or you don't know if your contact data has been imported into the NDP, contact the 211 NDP support team by email for assistance.
Connect to Data Using Power BI!
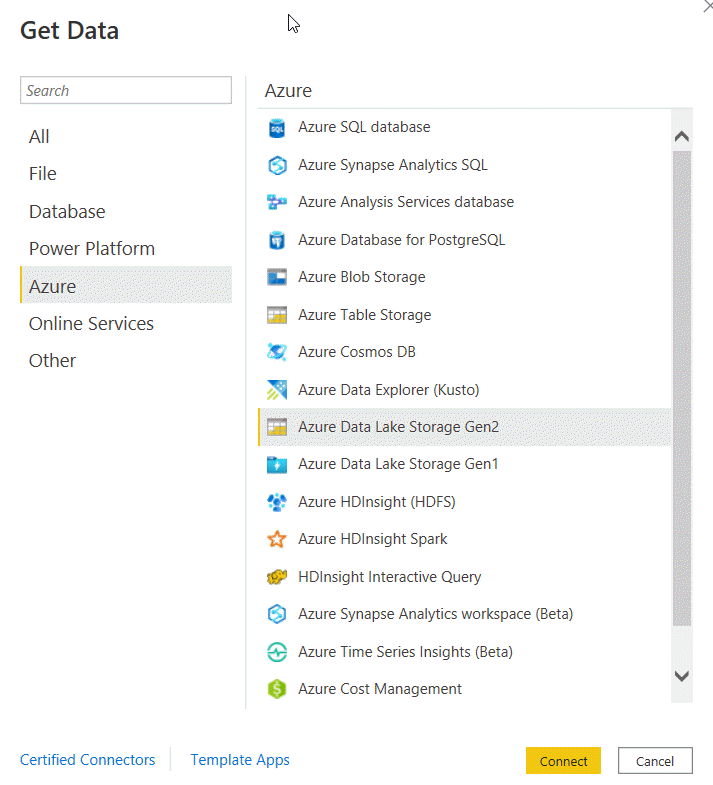
Step 1: Select 'Get Data' from the Power BI home screen, then select Azure Data Lake Storage Gen2 option from the Azure menu, as shown below
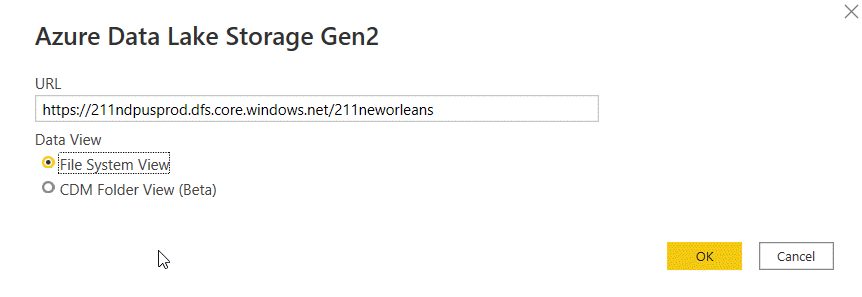
Step 2: Enter the URL for your data, https://211ndpusprod.dfs.core.windows.net/(your211NDPOrganization) where (your211NDPOrganization) is the unique name given to your 211 organization when you signed up for the NDP (if you do not know or have access to your organization name, contact 211 support). Ensure the 'File Syste View' radio button is checked, then click 'OK'. If you have not signed into your account, you will be prompted to login using your admim 211.org credentials
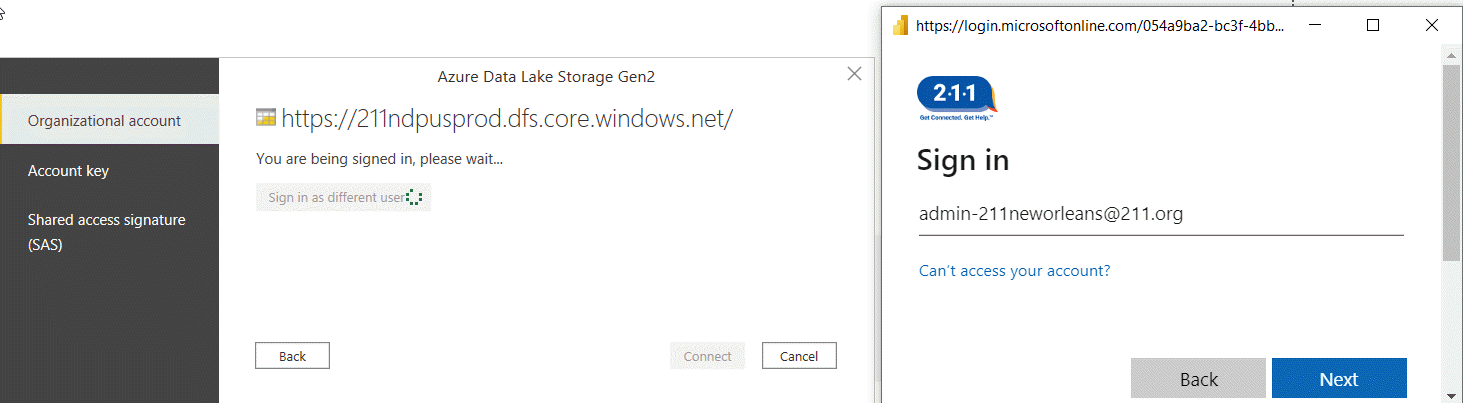
Step 3: If prompted to login, select 'Organizational account' from the left menu, then enter your admin 211-(your211NDPOrganization)@211.org credentials and password (note: your admin credentials were assigned when your organization signed up for an account)
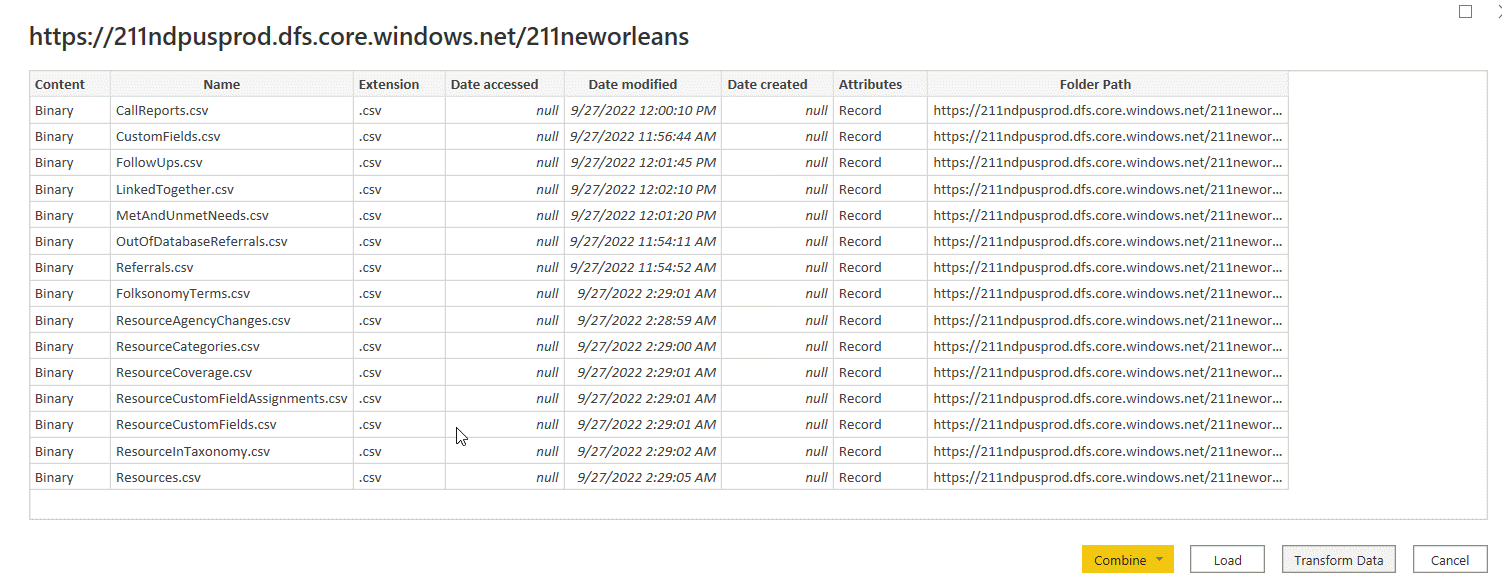
Step 4: Assuming that you have successfully signed into your organization's data container, a table listing all files available within your data container will appear. At this point, you have now successfully connected to your data in the NDP, and can import your data using the Load or Transform Data options. For information on how to import data and use Power BI to create analytics, visualizations and reports, start here
Connect to Data Using Tableau!
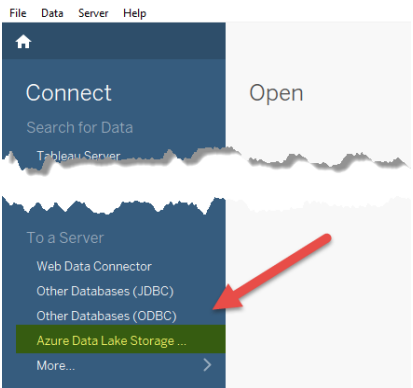
Step 1: Select 'Azure Data Lake Storage...' from the Tableau home screen, as shown below
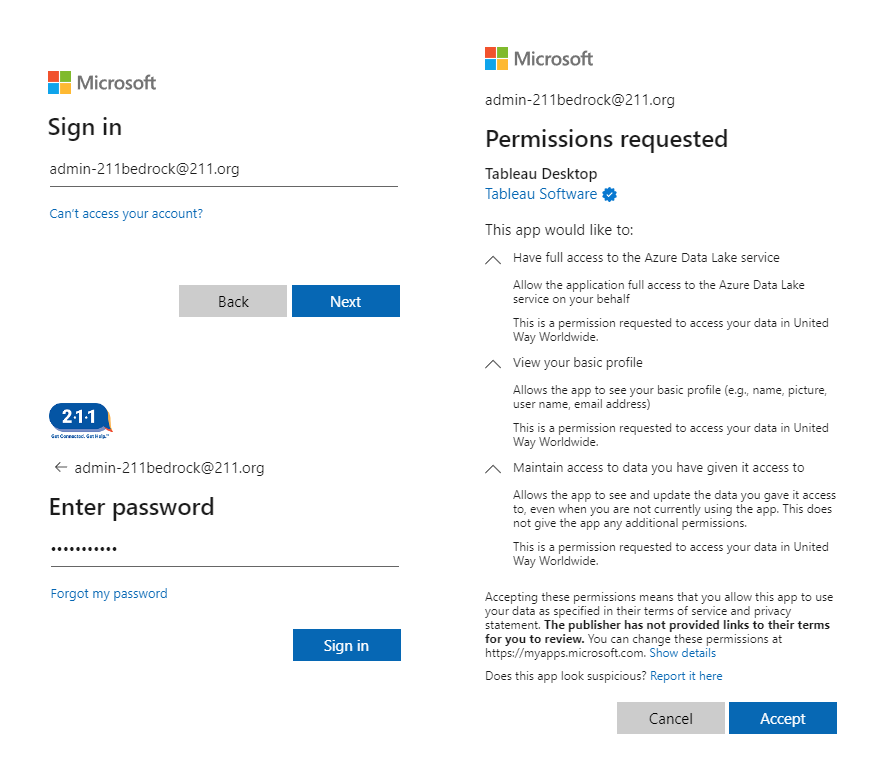
Step 2: Enter your 211 NDP organization administrator email account on the Microsoft sign in page, then click Next. Enter your administrator password, then click Sign In. Once signed in successfully, you are required to grant permissions to Tableau to access your data. Click Accept on the Permissions Requested window to grant the permissions. (Note: Granting permssions means that you are allowing Tableau desktop To connect to your data. Without permissions, Tableau cannot connect to your data, and the connection will fail. You can always revoke permissions by contacting the 211 NDP support team). If you don't know or have forgotten your administrator email account, contact the 211 NDP support team by email for assistance. If you have forgotten your password, click on 'Forgot my password', or contact the 211 NDP support team by email for assistance.
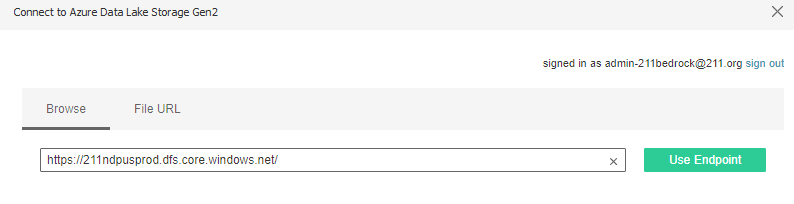
Step 3: After you have successfully logged in, you will be directed to the Connect to Azure Data Lake Storage Gen2 screen. Ensure the Browse tab is highlighted, and enter 'https://211ndpusprod.dfs.core.windows.net/', then click Use Endpoint. If permissions have been configured for your administrator email acccount to access your NDP data, you will be directed to the next screen where you will be presented with a list of organizations' folders. If you encounter an error (a few examples are shown at the bottom of this page), record or screenshot the error and contact the 211 NDP support team by email for assistance.
Note: Similar to Power BI, Tableau uses OpenId and OAUTH2 security protocols to secure your data, and permit the application to connect. Unlike Power BI, Tableau connects to the storage account endpoint; Power BI connects to the storage container endpoint. For this reason, The Power BI enddpoint (discussed above in the Power BI instructions) appends your organization's name to the endpoint, and connects directly to your data folders. What this means is that you will not see any other organization's folders in Power BI. It is important to note that eventhough Tableau shows a list of other organization' folders, you cannot connect to any other organizations' files - if you do try, you will get any error. Despite this difference' between Power BI and Tableua, both connection methods are equally and very secure.
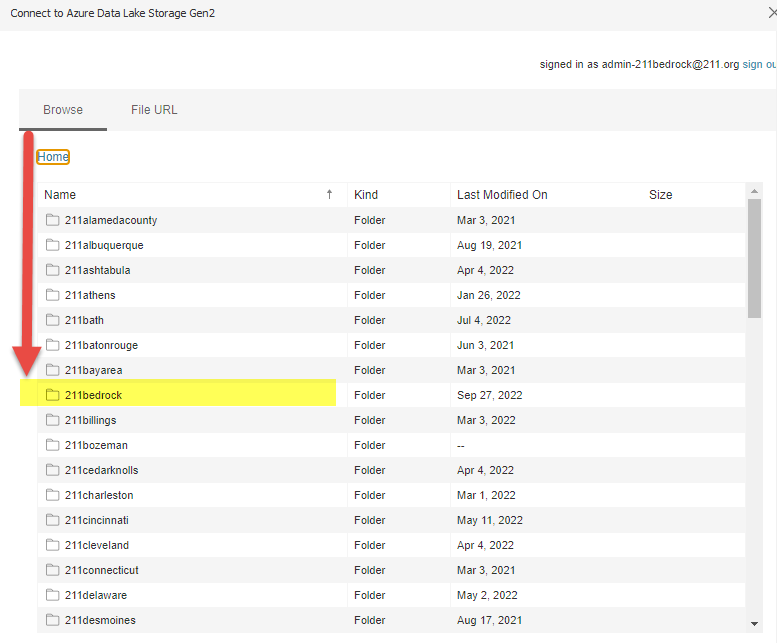
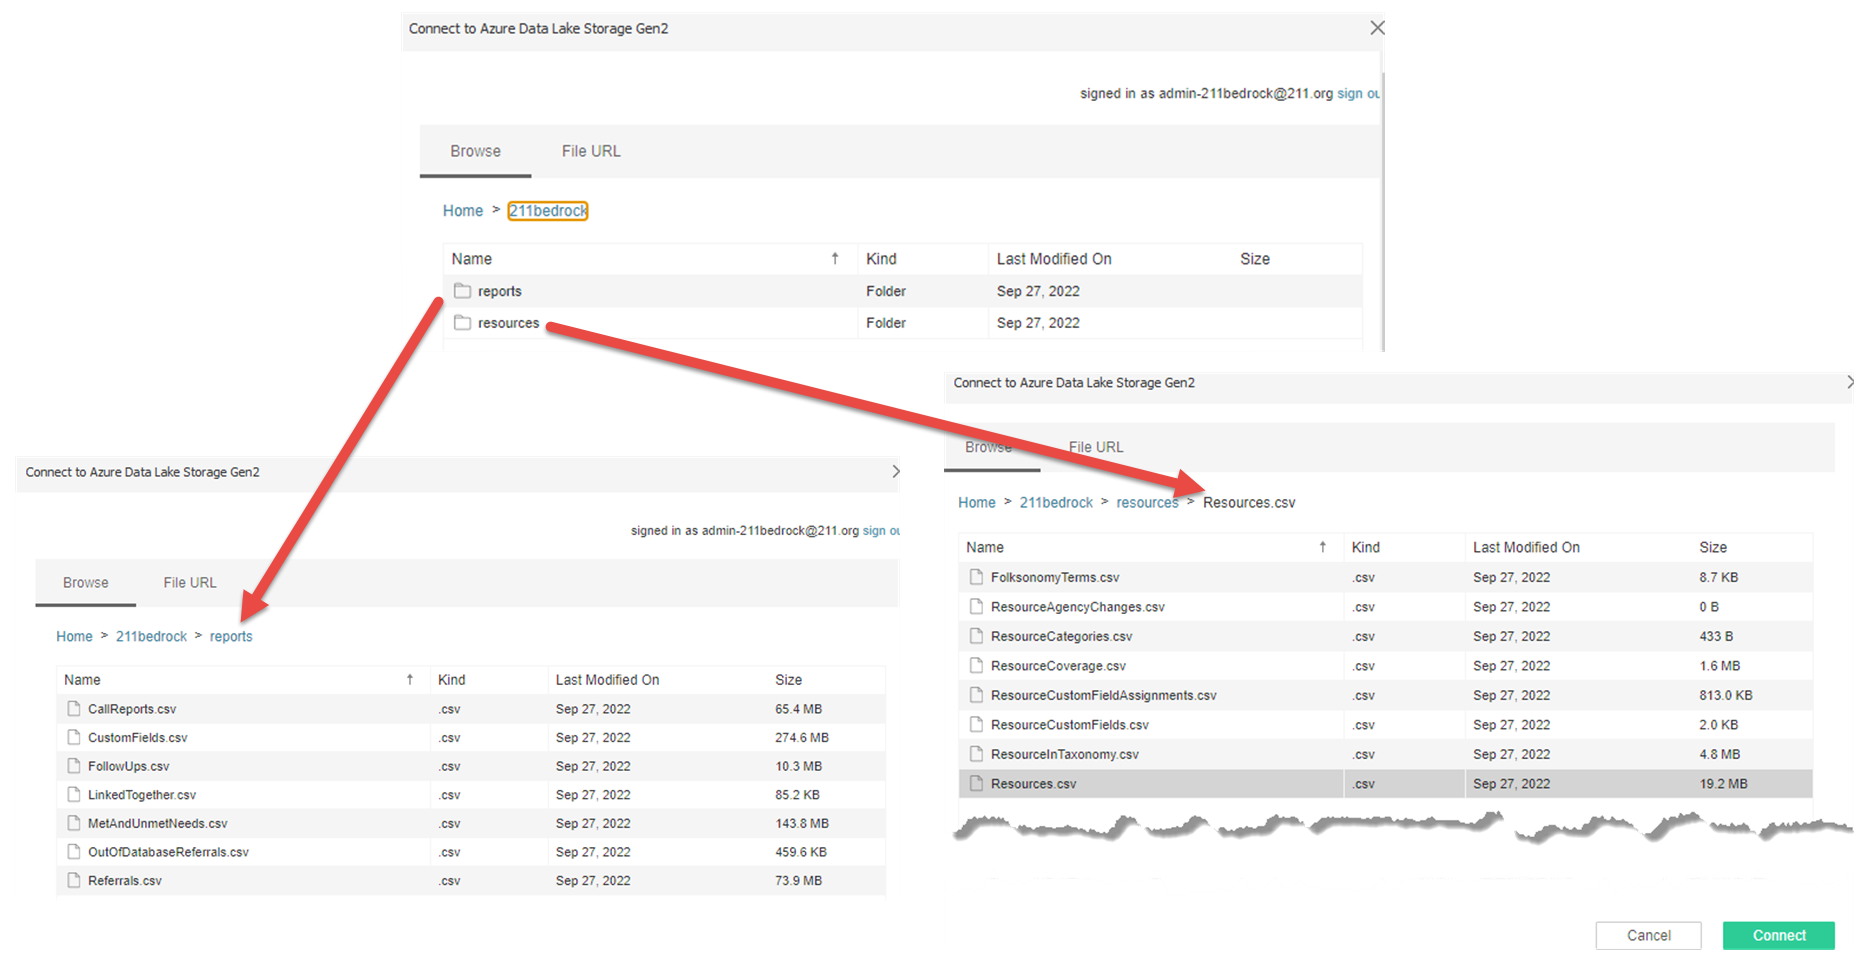
Step 4: You should now see a list of all 211 organization folders. You can view the contents of any folder, however, you can only view the contents of your own organization's folder. (Don't believe us...click on another organization's folder and click on a file to view the permissions error:). Scroll to your organization's folder, and click on it to view its contents. You will see a Resources folder and Reports folder. All 211s that have contributed their resource data on the platform will see their resource data. All 211s that have contributed their contact data will see files in the Reports folder (note: currently only iCarol customers can contribute their data to the NDP). Within the folder, select a
Step 5: Select a file from a folder, then click Connect to import your data into a Tableau worksheet. Congratulations, you have successfully imported your data into Tableau. You can now use Tableau to create analytics, visualizations and reports. For information on how to use Tableau, see here
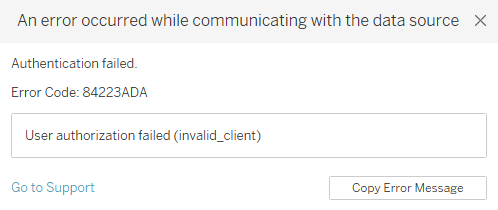
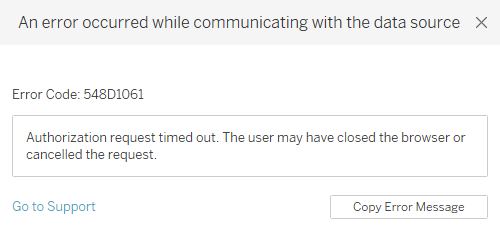
POSSIBLE ERRORS: Your data is secure in the 211 National Data Platform. For this reason, you may encounter one or more access or permission errors when attempting to connect to your data using Tableau. Below are a few examples of common errors. If you encounter one of these errors, or any other error, please record or screen shot the error and contact 211 NDP support by email.
Connect to Data Using Excel!
Step 1: Select 'Get Data' from the Excel home screen, then select Azure Data Lake Storage Gen2 option from the menu, as shown below
Step 2: Enter the URL for your data, https://211ndpusprod.dfs.core.windows.net/(your211NDPOrganization) where (your211NDPOrganization) is the unique name given to your 211 organization when you signed up for the NDP (if you do not know or have access to your organization name, contact 211 support). Ensure the 'File Syste View' radio button is checked, then click 'OK'. If you have not signed into your account, you will be prompted to login using your admim 211.org credentials
Step 3: If prompted to login, select 'Organizational account' from the left menu, then enter your admin 211-(your211NDPOrganization)@211.org credentials and password (note: your admin credentials were assigned when your organization signed up for an account)
Step 4: Assuming that you have successfully signed into your organization's data container, a table listing all files available within your data container will appear. At this point, you have now successfully connected to your data in the NDP, and can import your data using the Load or Transform Data options. For information on how to import data and use Excel to create analytics, visualizations and reports, start here
Video: Demonstates how to connect to your resource data using Excel